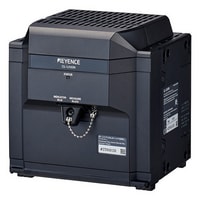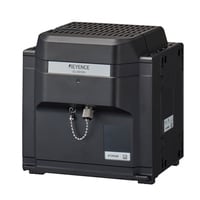
Confocal Displacement Sensor
CL-3000 series
Specs Confocal Displacement Sensor CL-3000 series
Optical Units and Sensor Heads - Quad type
|
Model |
CL-L007N*1 |
CL-L015N*1 |
CL-L030N*1 |
CL-L070N*1 |
CL-L150N*1 |
|||
|
Image |
|
|
|
|
|
|||
|
Type |
Optical unit |
|||||||
|
Head |
CL-L007 *1 |
CL-L015 *1 |
CL-L030 *1 |
CL-L070 *1 |
CL-L150 *1 |
|||
|
Reference distance |
7 mm |
15 mm |
30 mm |
70 mm |
150 mm |
|||
|
Reference measurement range |
Measurement range |
± 1.5 mm |
± 1.3 mm |
± 3.7 mm |
± 10 mm |
± 35 mm |
||
|
Linearity |
± 2.1 µm *2 |
± 0.49 µm *2 |
± 0.94 µm*2 |
± 2.2 µm*2 |
± 5.65 µm*2 |
|||
|
High precision measurement range |
Measurement range |
± 0.5 mm |
± 1.0 mm |
± 3.0 mm |
± 15 mm |
|||
|
Linearity |
± 0.91 µm *2 |
± 0.41 µm *2 |
± 0.72 µm *2 |
± 2.0 µm *2 |
± 4.65 µm *2 |
|||
|
Resolution |
0.25 µm*3 |
|||||||
|
Spot diameter |
ø 750 µm |
ø 300 µm |
ø 500 µm |
ø 600 µm |
ø 1000 µm |
|||
|
Laser class |
Optical unit |
Class 1 |
||||||
|
Sampling cycle |
100/200/500/1000 µs (Adjustable 4-stage) |
|||||||
|
Environmental resistance |
Enclosure rating |
Head |
IP67 (IEC60529) |
|||||
|
Ambient light |
Target surface illuminance 30,000 lux (Incandescent lamp) |
|||||||
|
Ambient temperature |
0 to 50°C |
|||||||
|
Relative humidity |
85% RH or less (no condensation) |
|||||||
|
Vibration resistance |
Head |
10 to 57 Hz, double amplitude 1.5 mm; 2 hours each for X, Y, and Z axes |
||||||
|
Optical unit |
10 to 57 Hz, double amplitude 0.3 mm; 2 hours each for X, Y, and Z axes |
|||||||
|
Shock resistance |
15G 6 ms |
|||||||
|
Temperature characteristic |
Head |
0.005% of F.S. / °C |
||||||
|
Optical unit |
0.015% of F.S. / °C |
|||||||
|
Material |
Head |
SUS |
Front: SUS Rear: Aluminium |
|||||
|
Optical unit |
Polycarbonate |
|||||||
|
Weight |
Head |
Approx. 140 g |
Approx. 180 g |
Approx. 200 g |
Approx. 280 g |
Approx. 380 g |
||
|
Optical unit |
Approx. 1600 g |
|||||||
|
*1 Sensor head and optical unit are a matched pair. Not cross compatible. |
||||||||
Optical Units and Sensor Heads - Focused spot type
|
Model |
CL-P007N*1 |
CL-P015N*1 |
CL-P030N*1 |
CL-P070N*1 |
CL-P150N*1 |
|||
|
Image |
|
|
|
|
|
|||
|
Type |
Optical unit |
|||||||
|
Head |
CL-P007 *1 |
CL-P015 *1 |
CL-P030 *1 |
CL-P070 *1 |
CL-P150 *1 |
|||
|
Reference distance |
7 mm |
15 mm |
30 mm |
70 mm |
150 mm |
|||
|
Reference measurement range |
Measurement range |
± 1.5 mm |
± 1.3 mm |
± 3.7 mm |
± 10 mm |
± 35 mm |
||
|
Linearity |
± 0.96 µm*2 |
± 0.49 µm*2 |
± 0.94 µm*2 |
± 2.2 µm*2 |
± 5.65 µm *2 |
|||
|
High precision measurement range |
Measurement range |
± 0.5 mm |
± 1.0 mm |
± 3.0 mm |
± 15 mm |
|||
|
Linearity |
± 0.55 µm *2 |
± 0.41 µm *2 |
± 0.72 µm *2 |
± 2.0 µm *2 |
± 4.65 µm *2 |
|||
|
Resolution |
0.25 µm |
|||||||
|
Spot diameter |
ø 50 µm |
ø 25 µm |
ø 38 µm |
ø 50 µm |
ø 75 µm |
|||
|
Laser class |
Optical unit |
Class 1 |
||||||
|
Sampling cycle |
100/200/500/1000 µs (Adjustable 4-stage) |
|||||||
|
Environmental resistance |
Enclosure rating |
Head |
IP67 (IEC60529) |
|||||
|
Ambient light |
Target surface illuminance 30,000 lux (Incandescent lamp) |
|||||||
|
Ambient temperature |
0 to 50°C |
|||||||
|
Relative humidity |
85% RH or less (no condensation) |
|||||||
|
Vibration resistance |
Head |
10 to 57 Hz, double amplitude 1.5 mm; 2 hours each for X, Y, and Z axes |
||||||
|
Optical unit |
10 to 57 Hz, double amplitude 0.3 mm; 2 hours each for X, Y, and Z axes |
|||||||
|
Shock resistance |
15G 6 ms |
|||||||
|
Temperature characteristic |
Head |
0.005% of F.S. / °C |
||||||
|
Optical unit |
0.015% of F.S. / °C |
|||||||
|
Material |
Head |
SUS |
Front: SUS Rear: Aluminium |
|||||
|
Optical unit |
Polycarbonate |
|||||||
|
Weight |
Head |
Approx. 140 g |
Approx. 180 g |
Approx. 200 g |
Approx. 280 g |
Approx. 380 g |
||
|
Optical unit |
Approx. 1600 g |
|||||||
|
*1 Sensor head and optical unit are a matched pair. Not cross compatible. |
||||||||
|
Model |
CL-S015N*1 |
CL-V020N*1 |
CL-V050N*1 |
CL-PT010N*1 |
|||
|
Image |
|
|
|
|
|||
|
Type |
Optical unit |
||||||
|
Head |
CL-S015 *1 |
CL-V020 *1 |
CL-V050 *1 |
CL-PT010 *1 |
|||
|
Reference distance |
15 mm |
20 mm |
50 mm |
10 mm |
|||
|
Reference measurement range |
Measurement range |
± 1.0 mm |
± 1.3 mm |
± 4 mm |
± 0.3 mm |
||
|
Linearity |
± 0.35 µm*2 |
± 0.45 µm*2 |
± 1.4 µm*2 |
± 0.22 µm*2 |
|||
|
High precision measurement range |
Measurement range |
− 0.2 mm/− 1.0 mm |
± 0.5 mm |
± 1.6 mm |
± 0.15 mm |
||
|
Linearity |
± 0.25 µm *2 |
± 0.38 µm *2 |
± 1.3 µm *2 |
± 0.2 µm *2 |
|||
|
Resolution |
0.25 µm*3 |
||||||
|
Spot diameter |
ø 10 µm |
ø 20 µm |
ø 40 µm |
ø 3.5 µm |
|||
|
Laser class |
Optical unit |
Class 1 |
|||||
|
Sampling cycle |
100/200/500/1000 µs (Adjustable 4-stage) |
||||||
|
Environmental resistance |
Enclosure rating |
Head |
IP50 |
IP40 degassed structure for vacuum environments *5 |
IP64 (IEC60529) |
||
|
Ambient light |
Target surface illuminance 30,000 lux (Incandescent lamp) |
||||||
|
Operating ambient temperature |
Head |
− 20 to 70°C |
− 20 to 200°C |
0 to 50°C |
|||
|
Optical unit |
0 to 50°C |
||||||
|
Relative humidity |
85% RH or less (no condensation) |
||||||
|
Vibration resistance |
Head |
10 to 57 Hz, double amplitude 1.5 mm; 2 hours each for X, Y, and Z axes |
10 to 57 Hz, double amplitude 0.45 mm; 2 hours each for X, Y, and Z axes |
||||
|
Optical unit |
10 to 57 Hz, double amplitude 0.3 mm; 2 hours each for X, Y, and Z axes |
||||||
|
Shock resistance |
15G 6 ms |
||||||
|
Vacuum |
Vacuum environments |
Ultra-high-vacuum environments *6 |
None |
||||
|
Explosion-proof rating |
Explosion-proof performance |
Head |
None |
||||
|
Optical unit |
|||||||
|
Zone/Division |
Head |
||||||
|
Optical unit |
|||||||
|
Ambient temperature |
Head |
||||||
|
Optical unit |
|||||||
|
Certification number |
|||||||
|
Temperature characteristic |
Head |
0.005% of F.S. / °C *4 |
0.013% of F.S. / °C *4 |
0.015% of F.S. / °C *4 |
0.1% of F.S. / °C *4 |
||
|
Optical unit |
0.015% of F.S. / °C |
||||||
|
Material |
Head |
SUS303/304 |
SUS304 |
Front: SUS Rear: Aluminium |
|||
|
Optical unit |
Polycarbonate |
||||||
|
Weight |
Head |
Approx. 350 g |
Approx. 100 g |
Approx. 1100 g |
|||
|
Optical unit |
Approx. 1600 g |
||||||
|
*1 Sensor head and optical unit are a matched pair. Not cross compatible. |
|||||||


